 WDCH
WDCH
Gmail Gmail – Complete Login & 2FA Security Settings Tutorial
Recovery Email Verification Login + Phone Number Binding + 2FA Two-Factor Authentication Setup Guide
💡 Security Verification Triggered During Login
When logging in from a new device or new network environment Gmail, Google's system will randomly trigger security verification. Simply follow the prompts below to select Recovery Email Verification and enter the corresponding recovery email address to complete login smoothly.
📌 Phase One: Recovery Email Verification Login
After entering your Google account and password, if identity verification is triggered, click on the 3 option (Confirm your recovery email / Confirm your recovery email)。
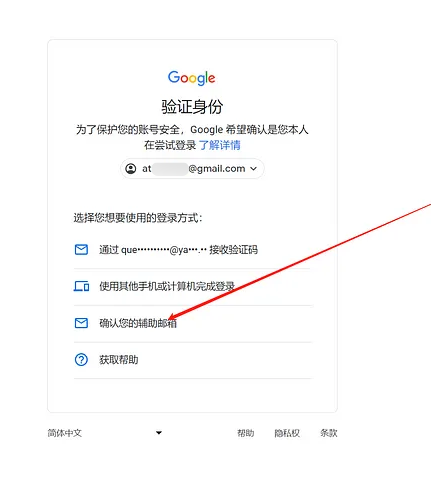
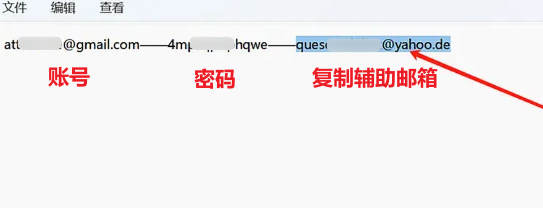
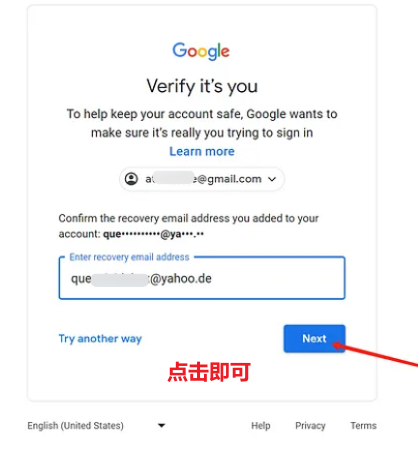
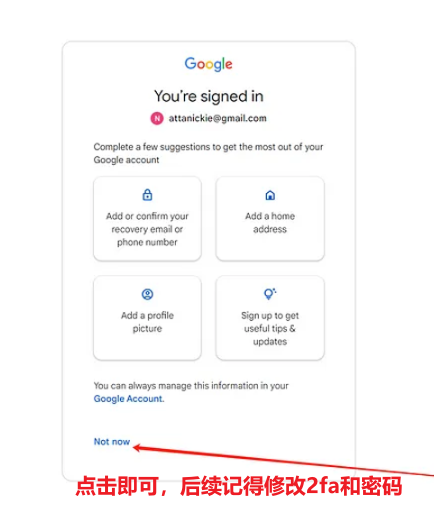
Enter the one provided in the delivered card credentials recovery email account (recovery email) then click “ Next ” to directly complete identity confirmation and successfully log in.
🔑 Phase Two: 2FA Online Verification Code Extraction Tutorial
If a 6-digit 2FA dynamic verification code is required during login or binding, you can extract it using the following methods:
- Copy the 2FA secret key(a string of letters and numbers, such as
DRJ2JL7PP2Q...)。 - Visit the online 2FA verification code generator (or click the online 2FA link included with the card credentials).
- Paste the 2FA secret key into the 2FA Live Secret / 2FA Key field, then click Submit / Get Verification Code。
- The tool will automatically generate a currently valid 6-digit verification code— copy and paste it into the Google sign-in page.
Open Google Authenticator or Microsoft Authenticator on your phone, tap the “+” icon in the bottom-right corner, select “ to enter the setup key ”, and paste the 2FA key from the card credentials to bind the account to your phone and view real-time dynamic verification codes anytime.
🔐 Phase 3: Security Enhancement Setup (Add Phone Number and Set 2FA)
To ensure long-term account security and stability, it is recommended to log in and go to the Google Account settings to bind your own phone number and enable 2FA two-factor authentication:
📱 1. Bind/Change Security Mobile Number
- Open the Google Account management center: myaccount.google.com。
- Click on the left sidebar menu “Security” (Security) option.
- Find “Ways you sign in to Google” ➔ “Recovery phone” (Recovery Phone)。
- Click to add or change your mobile number, then enter your currently active number to receive an SMS verification code and complete the binding.
🛡️ 2. Enable two-factor authentication for your account (2-Step Verification)
- In “Security” page, find and click “Two-Factor Authentication” (2-Step Verification)。
- Tap “Get Started” (Get Started), then re-enter your account password as prompted.
- Follow the prompts to bind your mobile number to receive SMS, or select an authenticator app App (to obtain your exclusive 2FA secret key).
- After completing verification, click “Turn On” (Turn On) . It is also recommended to save your “Backup Codes” (Backup Codes) to prevent being unable to log in if you lose your device.