 WDCH
WDCH
Complete Beginner's Guide to the v2rayN Windows Client
Protocol support + node import + smart routing + TUN mode setup
🔥 Why Choose v2rayN?
v2rayN is an open-source proxy client with broad protocol support. Some traditional Clash clients are no longer maintained and may fall behind newer obfuscation technologies, causing node timeouts and similar issues. v2rayN can fully support and stably run the advanced anti-blocking transport protocol VLESS + REALITY. It is compatible with common third-party subscriptions as well as the strongly encrypted nodes provided by this store, enabling stable, high-speed operation.
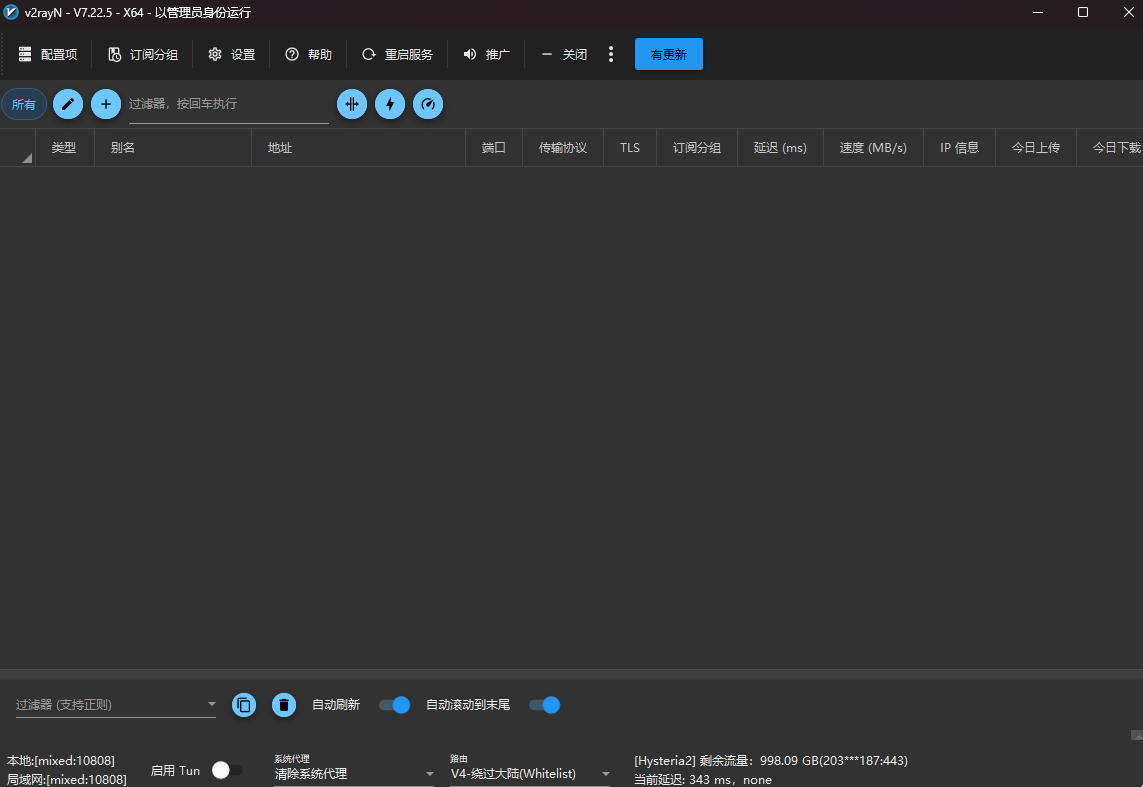
📥 Stage 1: Download and Launch
💡 Beginners should choose a stable release marked Latest.
📂 Folder Structure and Startup Notes
After downloading, extract the archive. A non-system drive such as D: is recommended when available.
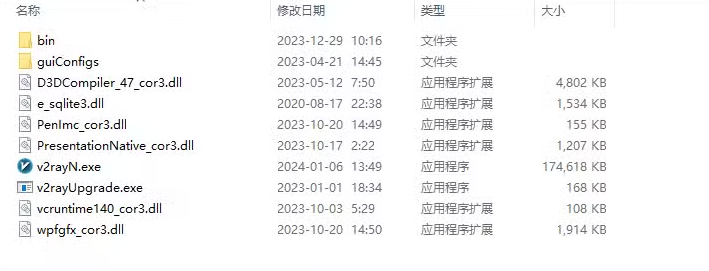
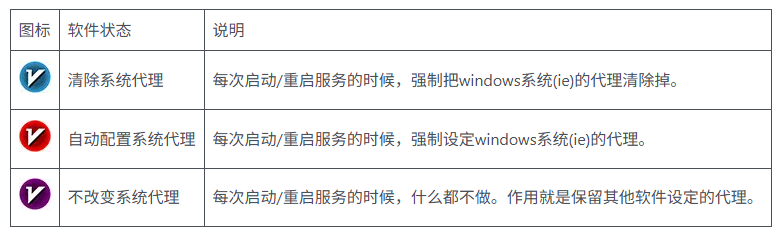
Locate v2rayN.exe. It is recommended to right-click and select “Run as administrator” so the app can manage network-adapter and proxy settings. After launch, it may minimize to the system tray. Double-click the blue V icon to open the main window.
➕ Stage 2: Add a Server (Import a Node)
🔗 Method 1: Import a Subscription URL
- In the main window, open the top menu: Subscription Group ➔ Subscription Group Settings.
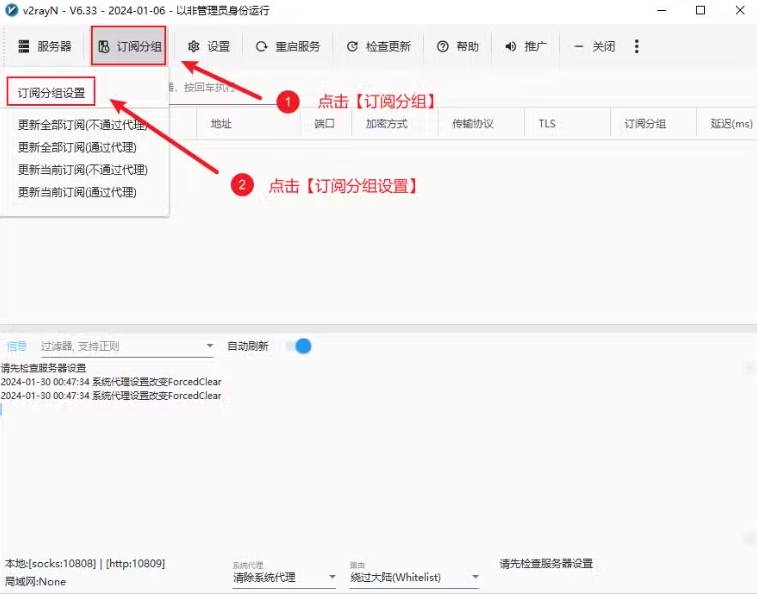
- In the pop-up window, click Add in the upper-left corner.
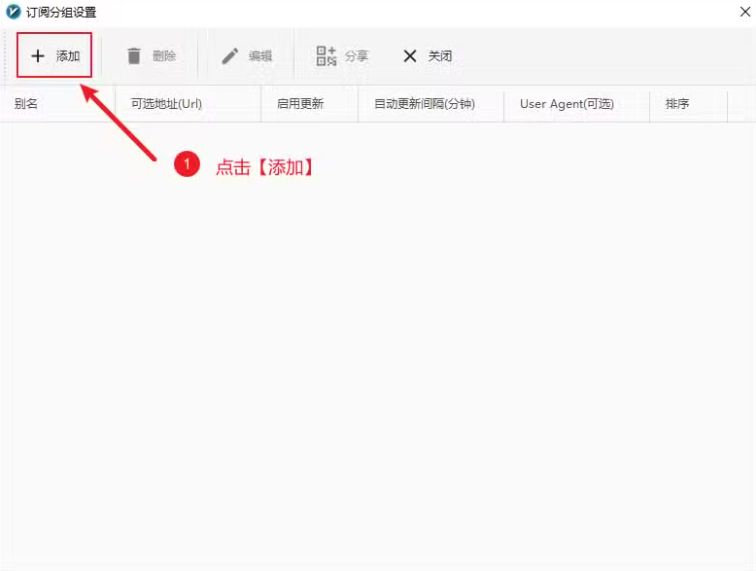
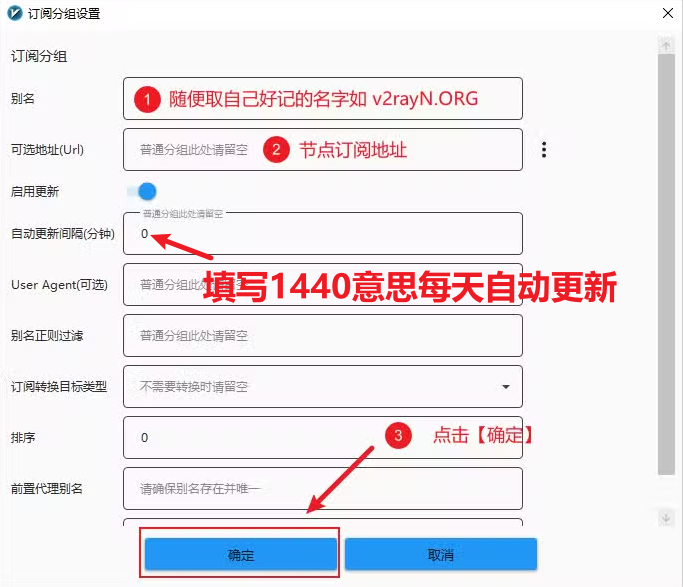
- In the “Alias” field, enter any name. Paste the subscription link supplied by your provider into Optional URL, then click Add and confirm to save.
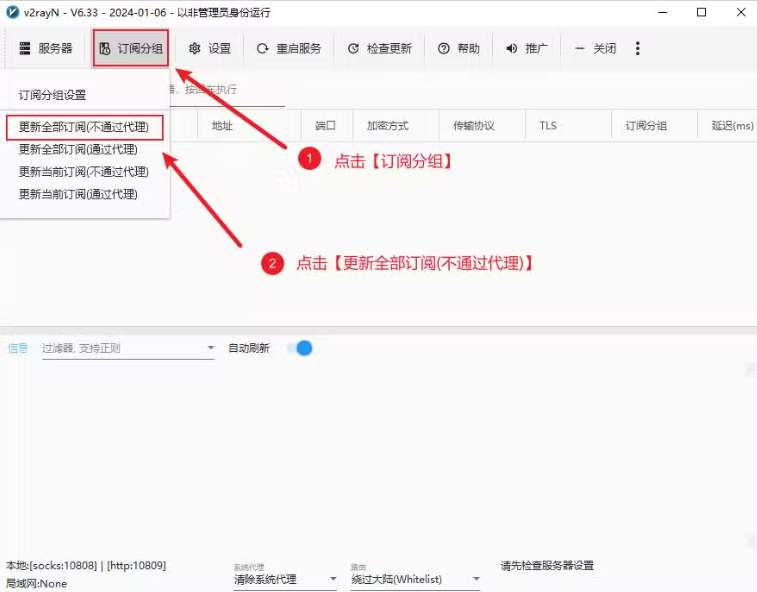
- Return to the main window and select Subscription Group ➔ Update All Subscriptions (without proxy). Wait for the update confirmation; the node list will then load.
📋 Method 2: Import from the Clipboard
If customer service sends you a single encrypted node link (supported schemes include vless://, vmess://, ss://, trojan://, etc.):
💡 Two quick import methods:
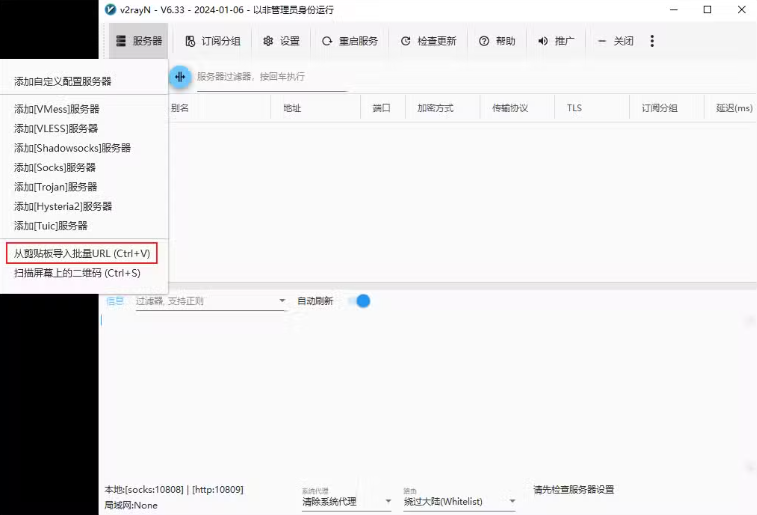
- Copy the node link, then in the main window select Server ➔ Import Batch URLs from Clipboard.
- Alternatively, copy the link, open the v2rayN main window, click once in an empty area, and press
Ctrl + Vto import the node immediately.
🚀 Stage 3: Enable the Proxy and Test Connectivity
1. Select the Active Node
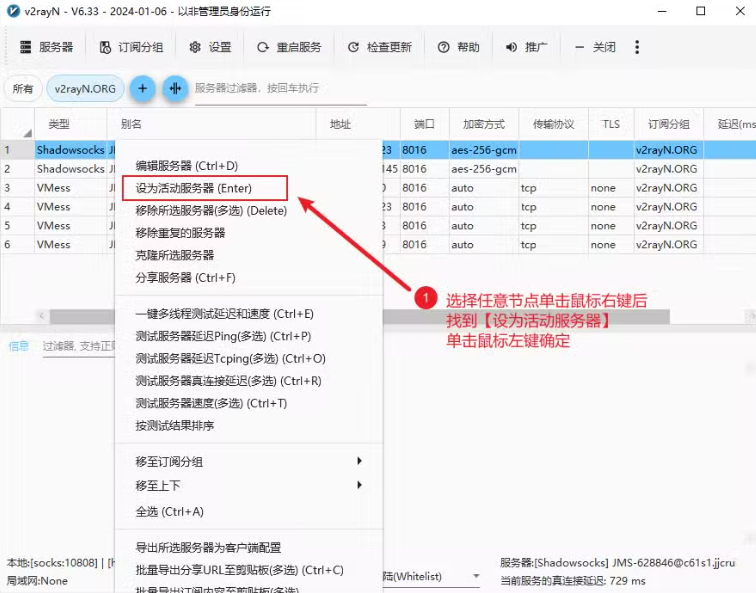
Select the node you want to use. Double-click it, or right-click and choose Set as Active Server. A check mark next to the node indicates that it is active.
2. Enable the System Proxy
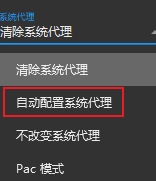
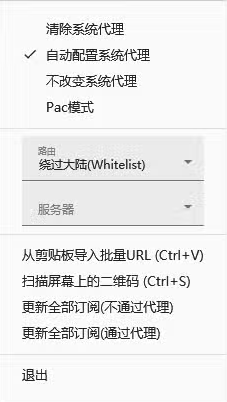
Right-click the v2rayN icon in the Windows system tray and set System Proxy to Automatically Configure System Proxy. The tray icon should change to its active color. Open a browser and visit a reachable overseas website to test connectivity.
3. Choose a Routing Mode (Smart Routing)
Use the controls at the bottom of the app or the right-click menu to choose a routing rule:
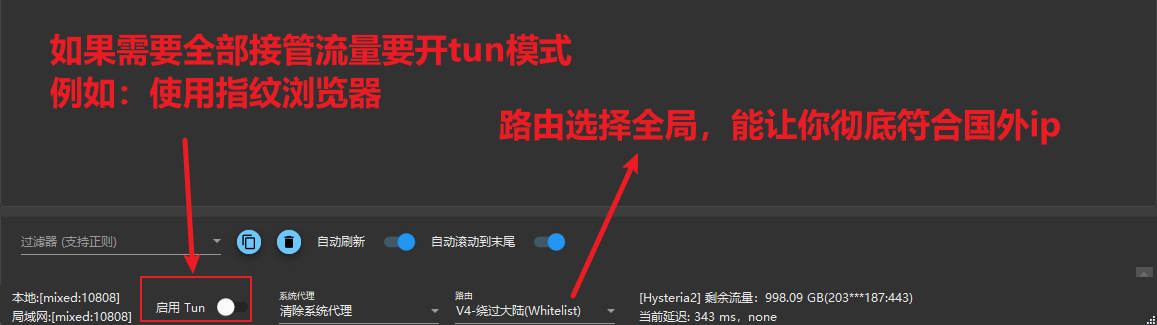
- Bypass Mainland China (Whitelist): mainland Chinese websites connect directly, while matched overseas destinations use the proxy. This is a common everyday setting.
- Blacklist: only destinations included in the selected rules use the proxy; other traffic connects directly.
- Global: all network traffic, including mainland Chinese websites, is routed through the proxy node.
⚙️ Stage 4: Advanced Settings (DNS and the TUN Virtual Adapter)
1. Configure DNS
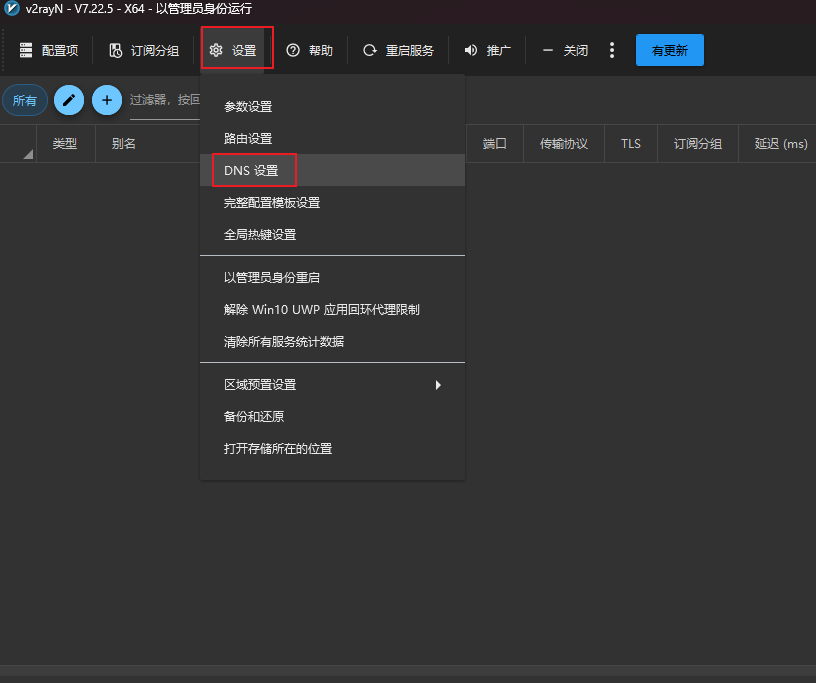
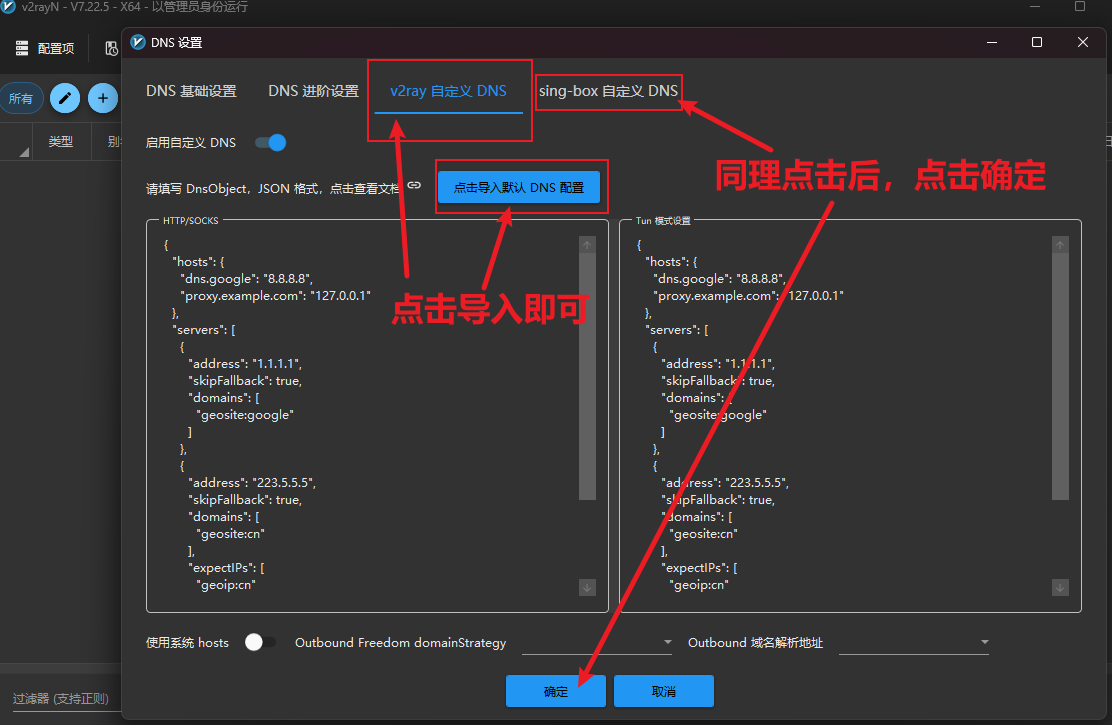
Open Settings ➔ DNS Settings. Beginners can start with the default preset, then verify that DNS follows the intended routing rules and does not leak outside the selected path.
💡 Anti-Detect Browsers, Command-Line Tools, and Apps: When to Use TUN Mode
If you are using an anti-detect browser such as BitBrowser or AdsPower, command-line tools, game clients, or other software that does not follow the Windows system proxy, you must enable TUN mode at the bottom of the main window to create a virtual adapter and route system-wide traffic.